- Published on
How to Observe EventBridge Events with Postman and WebSockets
Using Postman to observe your EventBridge events in real time

- David Boyne
- Published on • 6 min read

I have spent the last 18 months building Event Architectures using Amazon EventBridge, and I have to say I'm a huge fan of its potential and its ability to help us build solutions that can scale whilst remaining decoupled.
But like most Serverless development workflows the development experience can be a pain...
Whilst using Amazon EventBridge I felt there were a few improvements that could help me:
- The ability to document/share event schemas
- The ability to send events quickly vs CLI (and share with team)
- The ability to observe events in real time
So I decided to create and open source a few tools:
- EventBridge Atlas - Document your AWS Schemas
- EventBridge Canon - Fire events in seconds to your Bus
- cdk-eventbridge-socket - CDK Construct to create WebSockets with EventBridge
It turns out other people are having similar workflow desires and found these tools quite useful.
Whilst building cdk-eventbridge-socket I started to explore some tools and ways I could connect to a WebSocket URL and observe EventBridge events in real time.
Then I stumbled across a new feature from Postman. I connected to my EventBridge Events in real time using WebSockets and Postman and the experience was great!
I want to share with you how you can observe your EventBridge events in real-time using WebSockets and Postman within minutes.
•••In this short blog post we will cover:
- How to create a WebSocket for your EventBridge Bus
- How to setup custom rules for your WebSocket (filter events/sources)
- Using Postman to observe your events in real time
So grab a drink and let's get started.
•••What we will be building
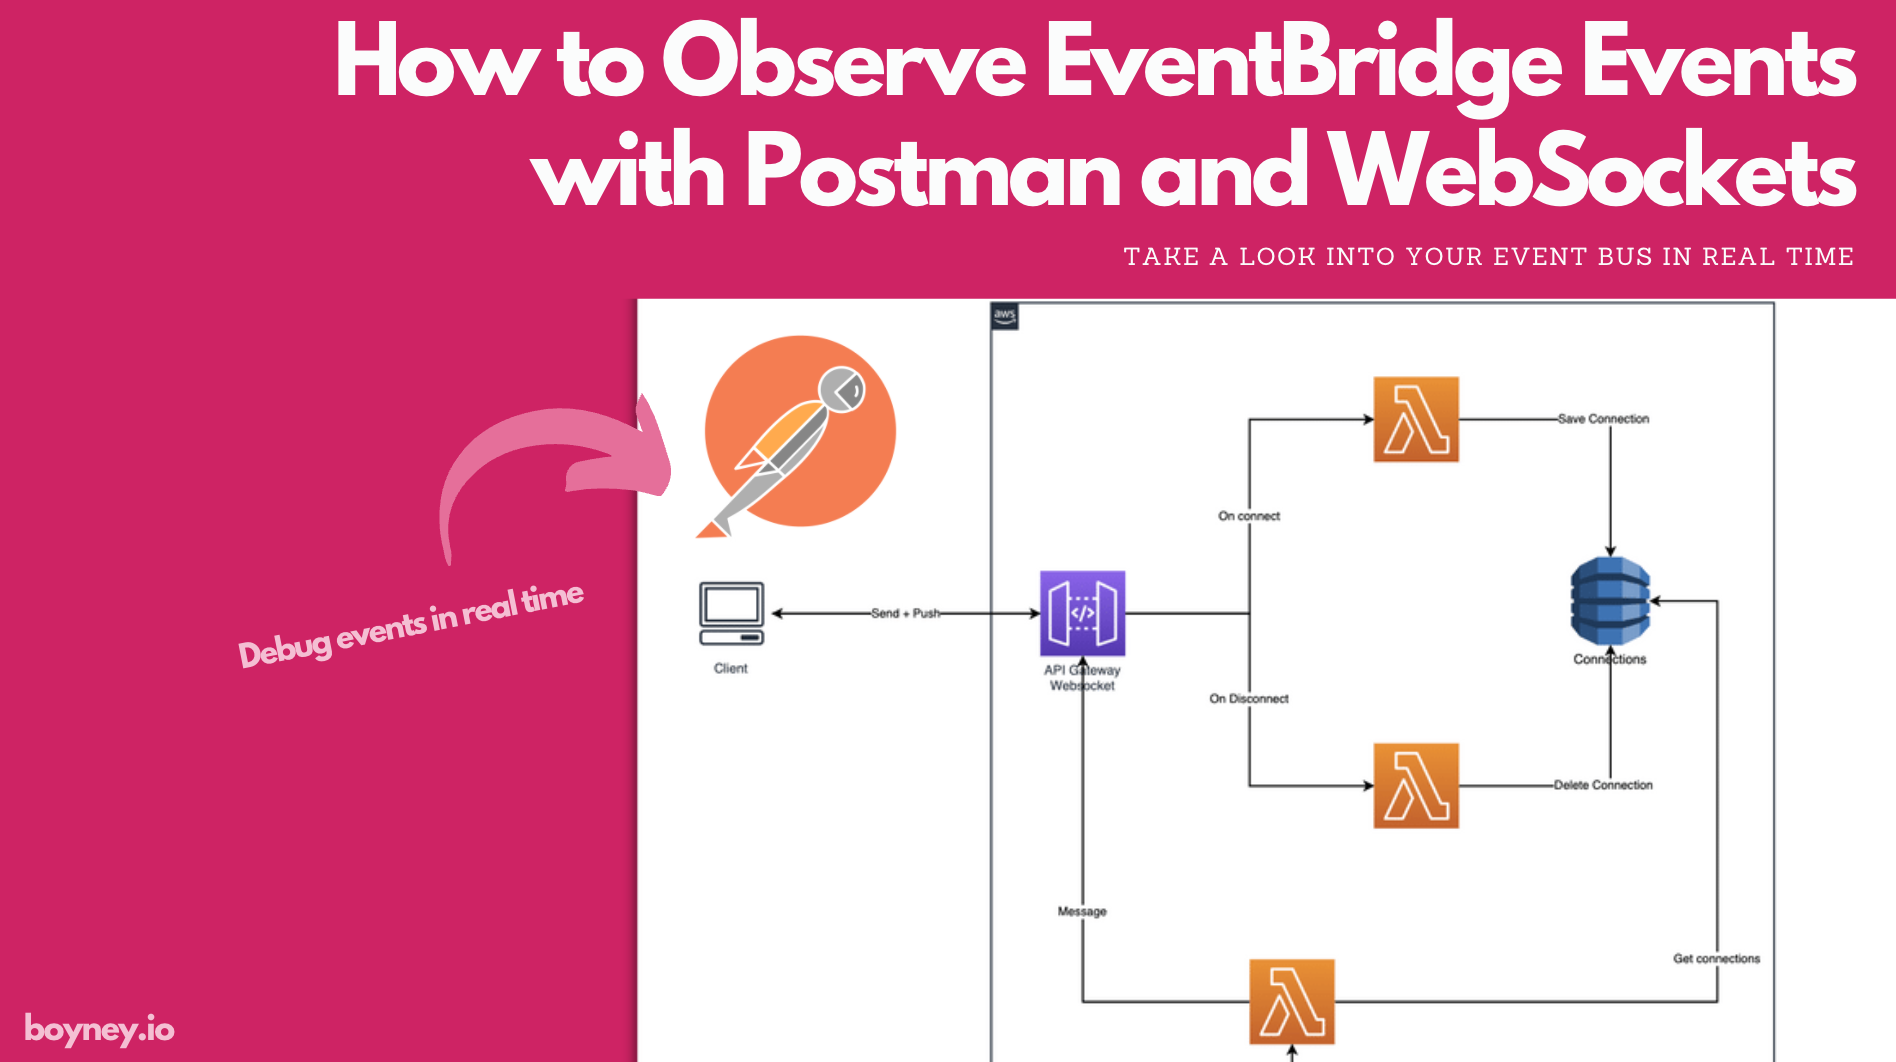
To see our Events in real time we will be using API Gateway with the WebSockets API with our EventBridge Bus.
 EventBridge with WebSockets
Let's quickly talk about how this AWS infrastructure looks:
- We will use API Gateway for our WebSocket
- Every connection will be stored in DynamoDB (gives us the ability to communicate with connected sockets later)
- A new Rule (Lambda) for our EventBridge Bus which forwards events to all connections.
Hopefully that's easy enough to understand, let's now create our WebSocket.
•••Creating our EventBridge WebSocket
We will be using AWS CDK to build our EventBridge WebSocket.
I have created a custom CDK construct that you can use to get started within seconds. Head over to cdk-eventbridge-socket and follow the instructions to get started.
Using cdk-eventbridge-socket here is an example of how easy it is to create your EventBridge WebSocket:
Example of using cdk-eventbridge-socket
import * as cdk from '@aws-cdk/core'

import { EventBridgeWebSocket } from 'cdk-eventbridge-socket'

export class EventbridgeWebhooksStack extends cdk.Stack {
  constructor(scope: cdk.App, id: string, props?: cdk.StackProps) {
    super(scope, id, props)

    new EventBridgeWebSocket(this, 'sockets', {
      bus: 'your-event-bus-name',

      // This example shows how to listen for all events
      eventPattern: {
        account: ['your_account_id'],
      },
      stage: 'dev',
    })
  }
}
Once you run this custom construct cdk-eventbridge-socket a WebSocket URL will be output to your console. This will be the WebSocket URL you will use with Postman later.
This custom cdk construct will build your API Gateway, Connection Management and EventBridge Rules. If you don't know how to use CDK I recommend getting started here.
The rest of this blog post will assume you are using the cdk-eventbridge-socket construct
•••Customising our EventBridge WebSocket
With cdk-eventbridge-socket construct you can specify which events you want to listen for.
Listening for all events on your bus
new EventBridgeWebSocket(this, 'sockets', {
  bus: 'your-event-bus-name',

  // Listens for all events on source
  eventPattern: {
    account: ['your_account_id'],
  },

  stage: 'dev',
})
Listening for all events on a source (All events on myapp.users)
new EventBridgeWebSocket(this, 'sockets', {
  bus: 'your-event-bus-name',

  // Listens for all events on source
  eventPattern: {
    source: ['myapp.users'],
  },

  stage: 'dev',
})
Listening for a detailtype (UserCreated event in this example)
new EventBridgeWebSocket(this, 'sockets', {
  bus: 'your-event-bus-name',

  // Listens for all UserCreated events
  eventPattern: {
    detailType: ['UserCreated'],
  },

  stage: 'dev',
})
Configure EventBridgeWebSocket how you wish. You can find more details on the eventPattern configuration on the AWS documentation website.
When running your CDK code cdk-eventbridge-socket will output your WebSocket URL.
Now let's connect to our new WebSocket URL using Postman.
•••Observing events in real time with Postman
Earlier this year Postman released support for WebSockets API.
If you don't have postman installed you can download it for free.
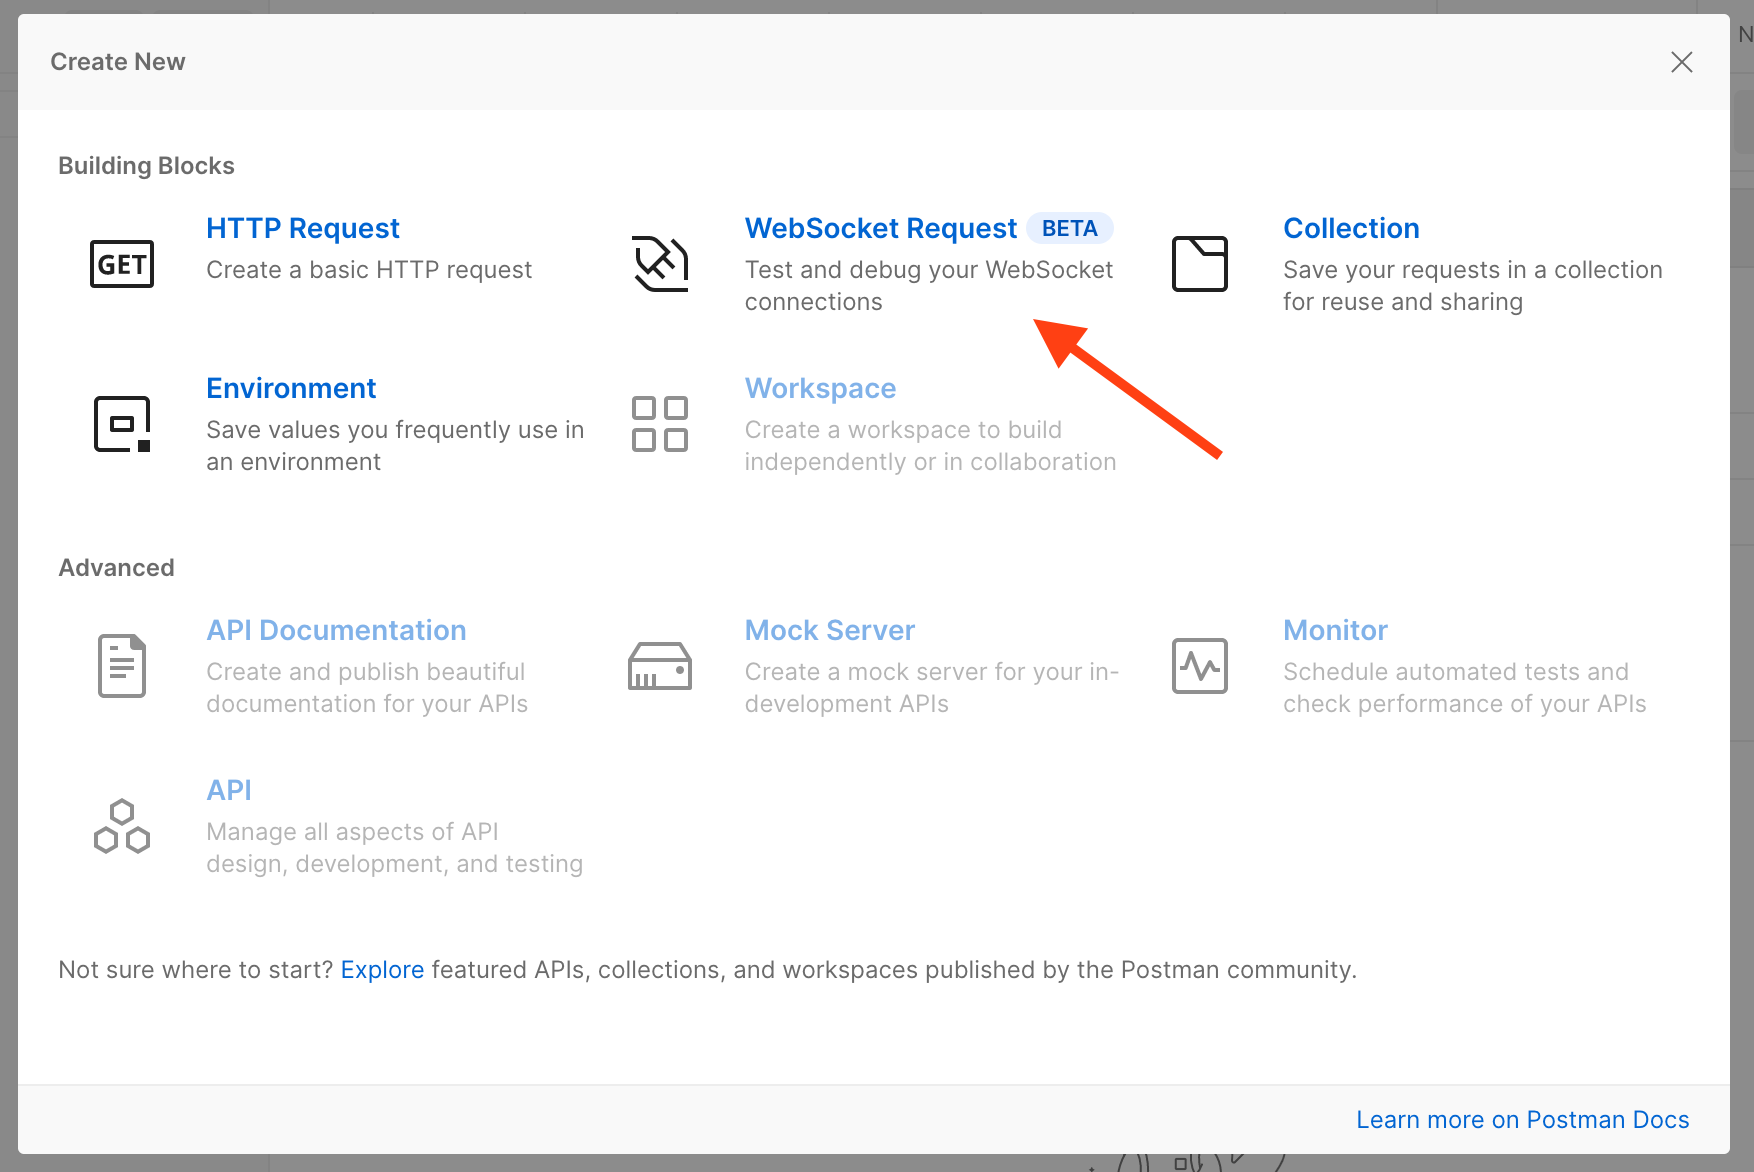
Launch Postman and create a new WebSocket Request.
 New WebSocket Request
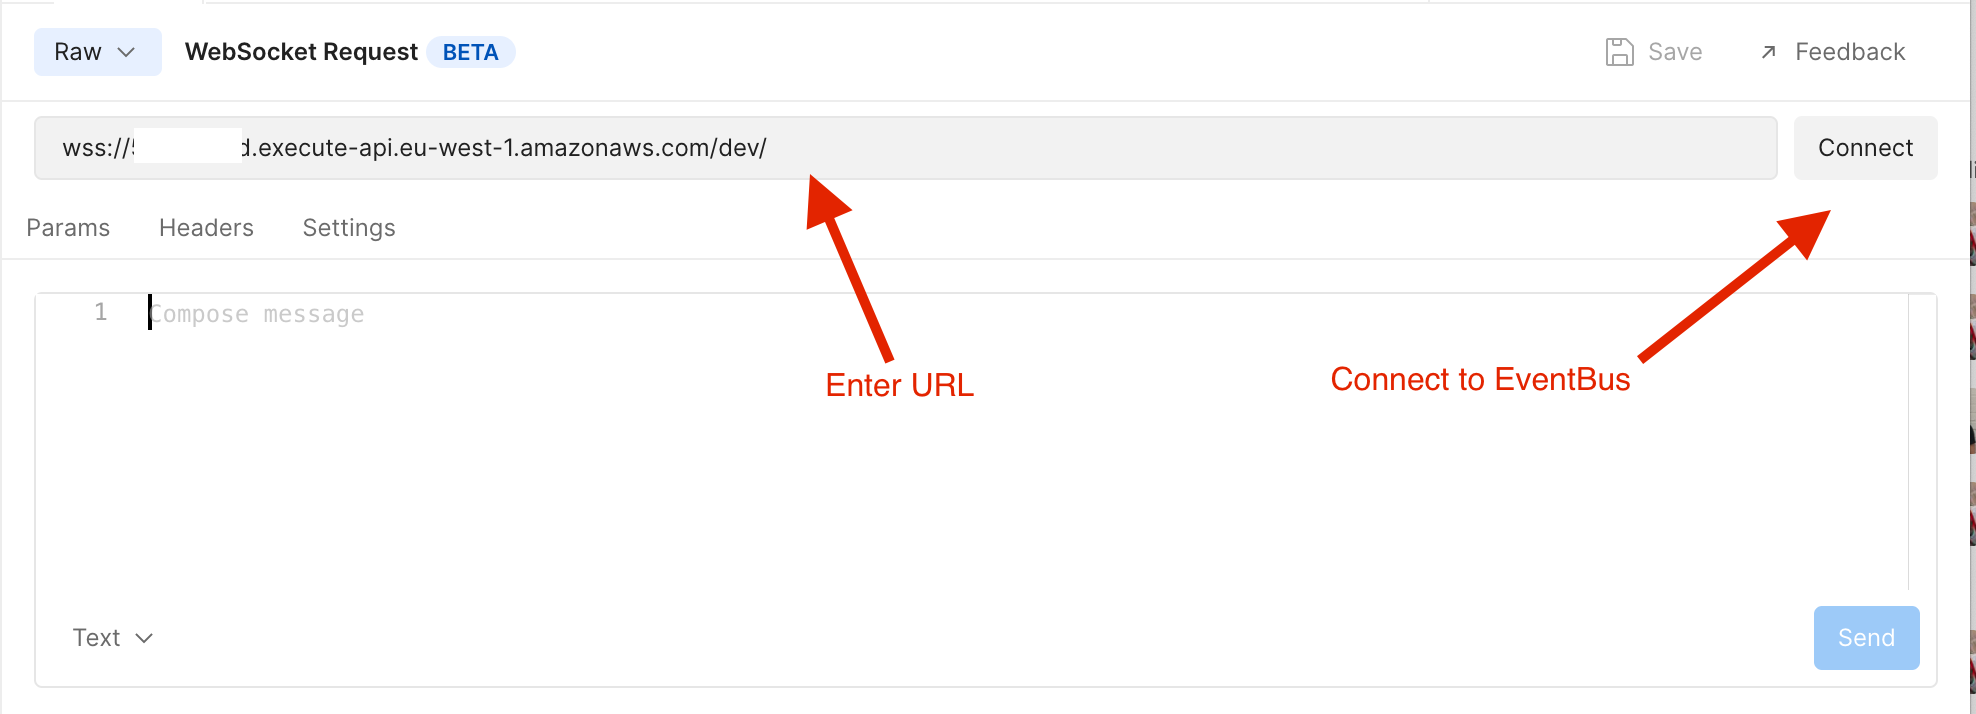
Now copy your EventBridge WebSocket URL into the server URL of your WebSocket Request.
The EventBridge WebSocket URL is output from the cdk-eventbridge-socket construct.
 Setup WebSocket in Postman
Next, click Connect. If all went well you should see the words connected.
You are now connected to your EventBus in real-time.
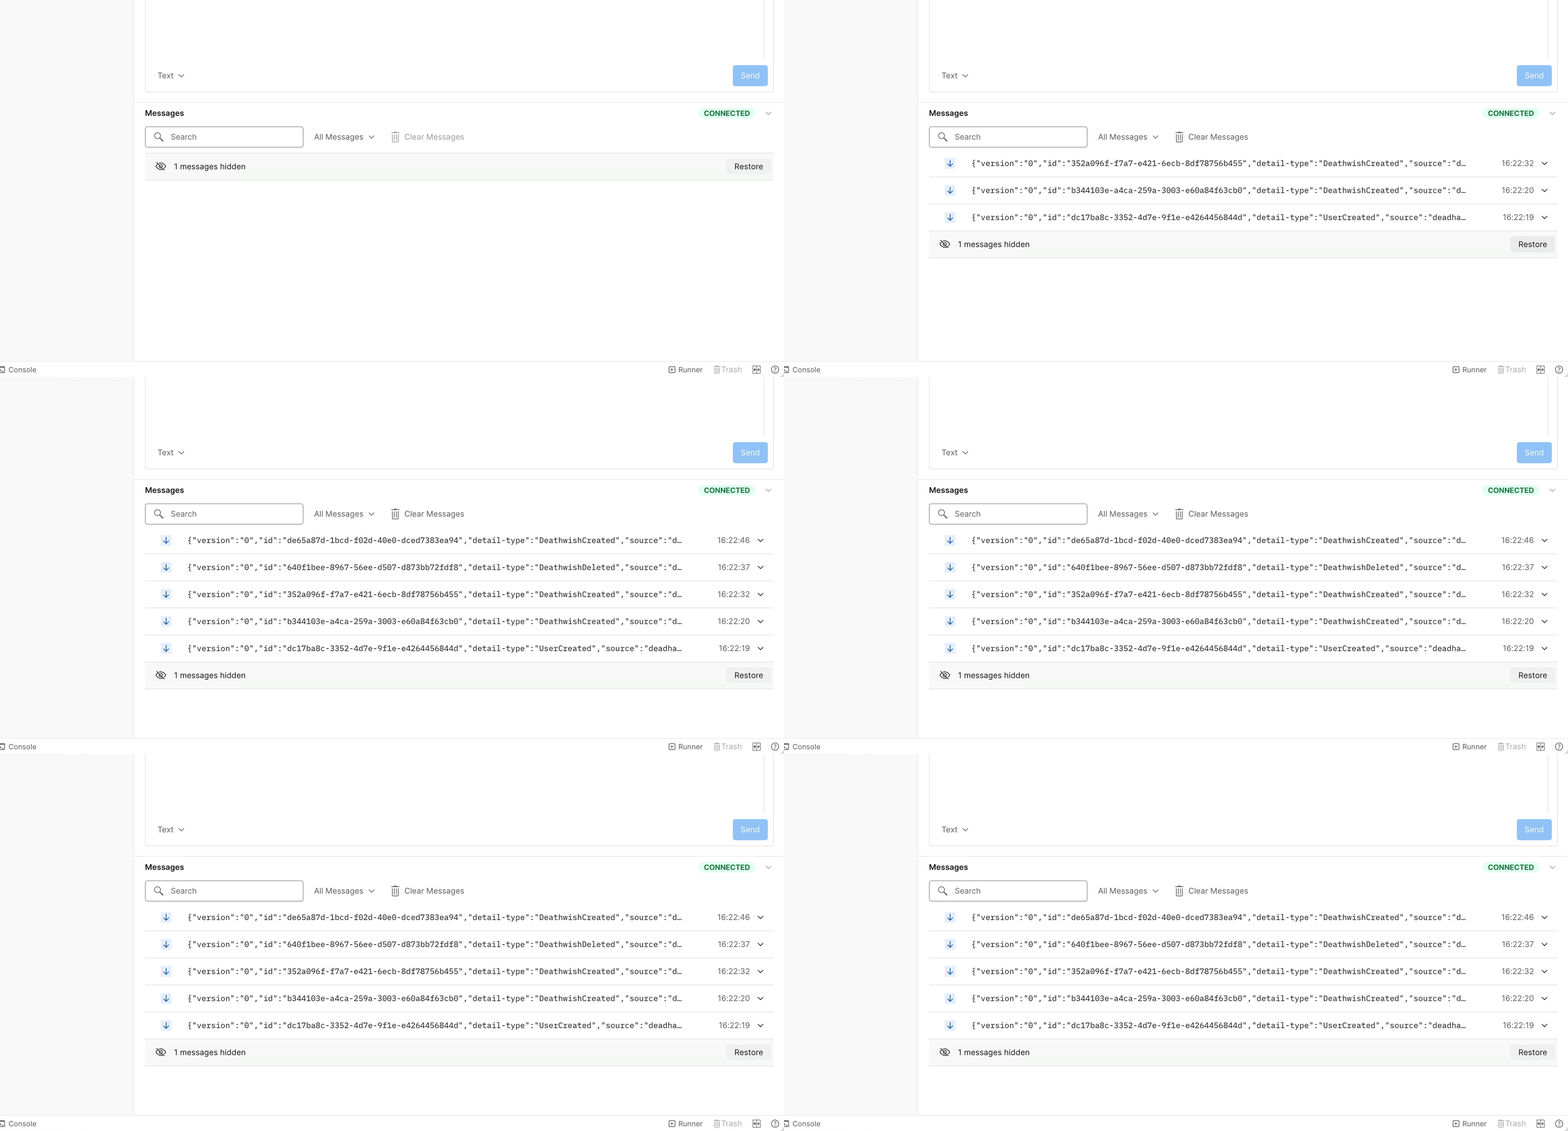
Next, trigger events on your Event Bus (using your own applications) and you will start to see the events coming up in Postman!
 Real time events in Postman
That's it!
We have managed to connect to our EventBus and observe our events in real time!
•••Summary
In this blog post we managed to:
- Create a EventBridge WebSocket
- Customise Event Patterns for our WebSocket
- Use Postman to see/debug our events in real time
This workflow is experimental and was inspired by random thoughts I had when working with EventBridge. If you find it useful or have any ideas/thoughts I would love to hear them!
•••Want to learn more Amazon EventBridge?
Get the EventBridge Book!A guide to walk you through Amazon EventBridge with practical examples, use-cases and advanced patterns.
What's next?
For me, I'm going to continue to explore WebSockets and Events.
I'm going to explore using EventBridge and WebSockets to display them in custom graphs and tools...
If you would like to follow my thought process or connect feel free to reach out or follow on Twitter.
Thanks for reading, and I hope this work helps!
